Visual Studio Code Extension
Build custom components in Visual Studio Code with the new VS Code extension.
As an additional option to using componenteditor.com, you can now use Visual Studio Code to create and edit custom components.
The extension is currently available as an early preview. It provides the following features:
- Show component syntax errors in the VS Code editor
- Render a preview that can be viewed in VS Code
Please not that the extension is currently only supported on Windows 64-bit.
To get started with the extension:
1. Install Visual Studio Code
If you do not have VS Code installed already, download the latest version from https://code.visualstudio.com/.
2. Visit the downloads page to download the latest version of the extension
It is not yet available in the Visual Studio gallery. At the time of writing, the latest version
is v0.0.1-dev.
Download the VSIX file listed under VS Code Extension.
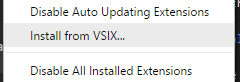
3. Install the extension in VS Code
Under the extensions tab, click the More menu and then Install from VSIX....
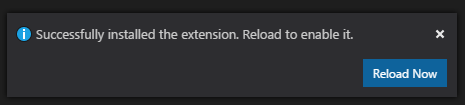
Click Reload Now in the message that appears.
4. Download the CLI Tool
The extension requires the Circuit Diagram Command-line Tool. Download the latest copy of this from the downloads page.
Extract the contents of circuit-diagram-cli.win-x64.zip.
5. Configure the extension
In VS Code, go to File -> Preferences -> Settings. Add the path to the CLI tool from the previous step.
{
    "circuitDiagram.executablePath": "C:\\Path\\To\\circuit-diagram-cli.exe"
}
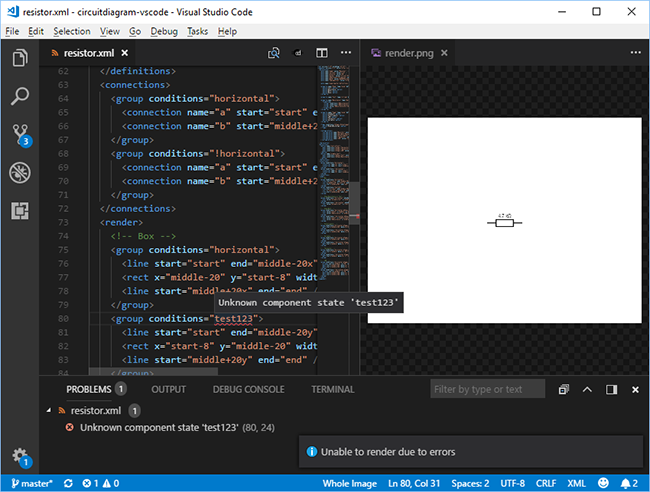
6. Open your component XML file
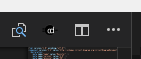
A Render Preview button will be shown in the top right corner of the editor.
Clicking this will show any errors and render a preview of your component.
7. Render Options
You can place a render.properties file in the same directory as your component to control how
the preview is rendered.
For example:
horizontal=true
$Resistance=220
This will render the component horizontally, with the Resistance property set to 220.